BLENDING SEAMS IN STITCHED PANORAMAS - PHOTOSHOP TUTORIAL
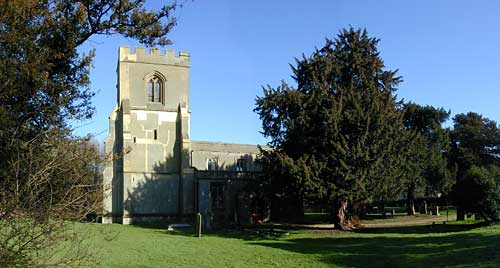
This is an output image from Panorama
Tools. It is a layered PSD file with masks, there being four layers. Image
3 is very slightly darker than the others, spoiling an otherwise
nice stitch. (The darker image in the middle will be more obvious if
you drag the window to and fro or scroll the image). The way to improve the blend of images at a seam is to
feather the left edge of the upper image just in the area of the sky, and leave the existing
harder edge join in the lower part of the image (to avoid blurring where there
is a lot of detail). This is quite easy to do.
Switch into mask editing mode
Display the layers palette:
(Note: This shows the palette in Photoshop CS
and earlier versions. In CS2, the second column has gone. The editing
mode - image or mask - is then indicated by a highlight border to the thumbnail
image).
Click on the black
and white mask thumbnail in layer L03. This puts us into mask editing
mode and the paintbrush symbol in column two will change to a circle. In
this mode, you can paint on the mask with black, which will have the effect
of making the corresponding image pixels transparent. Paint with white
and the pixels become opaque. Shades of grey give degrees of transparency.
As you paint on the image, you will see the affected parts of layer L03
coming and going according to the colour of the paint brush. The mask
itself will not be visible, but you can show it as a red overlay by pressing
the backslash key. (Press it again to switch the overlay off).
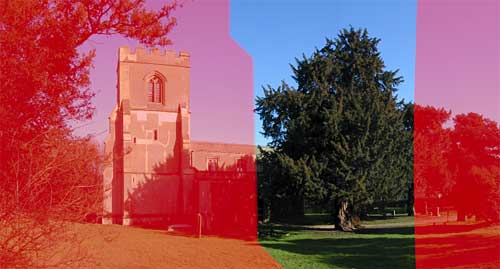
Here, then, you see
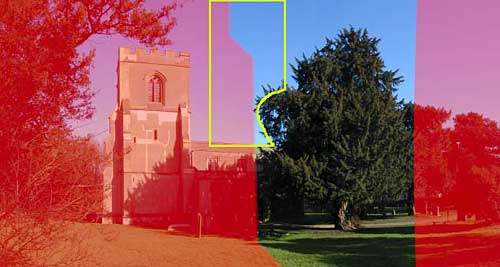
the outline of the mask in L03. Now make a selection with the rectangular
marquee around the seam in the sky, and then bite a lump out of the bottom right
corner using the lasso tool with the ALT key. This confines the selection
to the sky, more-or-less.
With the foreground
colour set to black, and background colour set to white, select the gradient
tool and pull it across left to right within the selected area. Hold down
the shift key while you drag, to keep it aligned with the horizontal. The
start and end points of the drag should be well within the selection to keep the gradient within the area of
overlap of the two images. (You'll soon see what happens when you go too
far - just repeat the gradient).

Now you can deselect (ctrl/d) and turn off
the red mask (backslash key) and see the effect.

This is much better.
You can return to normal image editing mode by clicking on the image thumbnail
in L03, or go on to edit another mask. (I did the seam on the right as
well in the above image).
John Houghton
j.houghton@ntlworld.com
17th August, 2005